Note: The many photos in this post are fairly large on the screen. If you’d like to see these quilt illustrations smaller so more than one fits on the screen, try pressing CTRL and – (minus) on your keyboard. Repeat several times to go smaller and smaller. CTRL and + will increase the size so you can read the font. This is also comes in handy if you’re viewing a website with tiny print – just make it bigger. The trick works in both Internet Explorer and Firefox (and possibly other web browsers).
You’re probably surprised that I waited this long to write about the Log Cabin block – it seems to be a pretty easy block. I had a few good reasons, though!
- In its most traditional form it can require more precision than a first-time quilter may want to deal with.
- Several of the other skills can be put to use with this block.
- The variations make more sense when you are comfortable with triangles and have a better understanding of color, value, and block design.
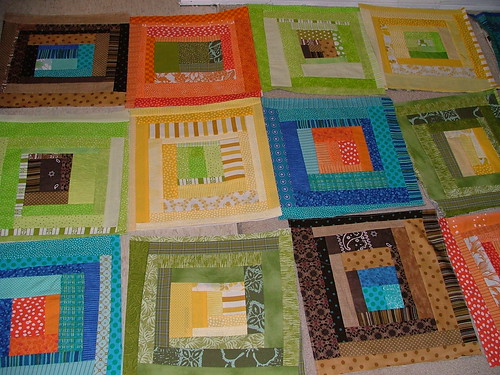
I believe the Log Cabin is the most versatile of all pieced blocks. Changing strip numbers and sizes, adding triangles, changing the base shape, and changing value or color placement all result in new and exciting designs. I don’t like to make the same quilt twice. In looking through my projects, though, I find I’ve worked on at least 9 projects with the Log Cabin as a base.
There are many variations of the log cabin, which is why this is going to be a very long post! It is extremely photo and illustration heavy, but even so you might want to go get a snack or possibly even take a nap before starting.
At its heart, a log cabin block is simply a square with strips sewn around it. Does this very popular quilt look familiar?

Yep, that’s a log cabin variation often referred to as a square in a square. This one has three layers – center square, first round, second round – but a single round of strips is also very popular.
Construction
Log cabin construction is pretty straightforward. Start with a square, add strips around it until it’s the size you want, and you’re finished. The basic construction techniques can be applied to many different kinds of log cabin blocks, so let’s go through the construction first, and then I’ll show you the variations.
Option 1 – Cut to Size
This option takes more time during fabric preparation, but potentially makes that up by cutting multiple pieces at once. It does require a bit of math and organization.
Cut a square 1/2″ larger than you want the center to finish. I cut the square at 1 1/2″. Traditionally the center square is a different color from the logs (often red, thought to symbolize the heart or hearth).
Cut strips for the logs in whatever width you choose. Remember to add 1/2″ to your finished width for the seam allowance. For this example, all strips will be the same width, 1 1/2″. Choose fabrics with both light and dark values. The value contrast is the most important thing!
Subcut the strips into precise segments.
- Start with one LIGHT segment in whatever width you choose and as long as your center square. In this example, it’s 1 1/2″ square.
- Cut one light and one dark segment that is the length of the center square plus the FINISHED width of the strips (the width of the cut strip minus 1/2″ seam allowance). In this case, 1 1/2″ x 2 1/2″.
- Cut one light and one dark segment that is the length of the last segment plus the finished width of the strips. In this case, 1 1/2″ x 3 1/2″.
- Repeat with one light and one dark cut the length of the last segment plus the finished width of the strips. Continue until you have as many rounds as you want. In this case, 1 1/2″ x 4 1/2″, 1 1/2″ x 5 1/2″ AND 1 1/2″ x 6 1/2″.
- Finally, cut one DARK (no light) segment the length of the last segment plus the finished width of the strips. In this case, 1 1/2″ x 7 1/2″. (If you prefer your block to be primarily light, you can start with one dark square and end with one light segment.)

When you’re doing this with logs that are all the same width, the measurements are fairly easy. They’re REALLY easy if your logs finish at 1″ because each strip is exactly 1″ longer than the last set.

Sew the light square and center square together, then press to the light. With log cabin blocks I prefer to press to the most recently added log. This way you don’t create any bulky seams.

The sewn unit should be the same length as the next light rectangle.

Always place the new strip on the bottom and the pieced segment on top when you sew them together. That way any seams are on top where you can see them and make sure they don’t fold back as they go under the presser foot. You should always add logs in the same direction, either clockwise or counter-clockwise. The easiest way to remember which way you’re adding them is to always place the sewn unit on the next log with the most recently added log either at the top or at the bottom (choose one!). For this block, I chose to put it at the bottom.

Sew the unit to the next log and press to the new log.

Repeat, each time making sure the new log is the same width as the unit you’re sewing it to, and placing the newest log at the bottom.

When you use this method, you may start to notice that your next log is not exactly the same length as the unit. You can see in the photo below that the log is a little shorter than the unit. Assuming you cut the log accurately, that means your seams are either too large or too small. In this case, my seams were too small. Log cabin blocks, because of so many seams, often get out of square or too large or small. Using this method, the precut logs will tell you when your block is not correct. You can trim the unit if it is too big, but if it is too small you will need to take it apart and correct the seams. (Alternatively, you can try to make adjustments with a smaller seam in the next round to get the block back on track.)

I chose to sew this log on and then trim the block to size.

This is relatively easy to do if you are using 1″ logs – after a full round is sewn to the center, it should be 1/2″ larger than the number of logs across (in this picture above, 3 logs).
Keep sewing rounds, always placing the newest log at the bottom when adding the next log. End with your single dark log.

Quarter Inch Seams
If you are challenged by consistent quarter inch seams, log cabins can be overwhelming. The more rounds you add, the greater the likelihood your blocks will be off. However, like most of the other components we’ve demonstrated in Skill Builder Series, you can work around that problem by cutting the strips wider and trimming to size.
For option 1, square up your block after each round of logs, whether a “round” is four sides or two sides, as in the Chevron variation.
Option 2 – Chaining the Strip
Okay, I made that name up. This method is great if you don’t want to deal with the math or aren’t good at keeping piles of cut fabric neatly organized.
With this method, you will cut your center squares to size, then cut strips of everything else. You do NOT have to pre-cut the logs to size. I find this to be faster than precutting the logs and I don’t have as many small pieces of fabric floating around. Because you don’t have a pre-cut log to compare to the size of the unit as you build it, you need to be more aware of your seam allowances. You can avoid this problem by cutting your strips slightly wider than necessary. Since you have to trim the pieces apart anyway, cutting the strips 1/4″ wider keeps your blocks consistent and doesn’t really add much time.
Also, you’ll be chain piecing the blocks, so it may seem like you aren’t making much progress, then all of a sudden you’ll have several blocks finished at once. I’ve chained as many as ten blocks at a time, but for this tutorial I’ll do three.
Again, I’m using 1 1/2″ center squares and 1 1/2″ wide strips. (If you’re cutting your strips wider, try 1 3/4″ strips.)

Place the strip under your presser foot and put each center square on it, lining up the right edge and leaving about 1/4″ space between the squares. A little extra space is a good thing – too close together can result in cutting errors. Sew the squares to the strip.

Trim each unit to size. The units below are trimmed to 1 1/2″ wide.

As with option 1, always place your segments on the next strip with the newest log consistently at either the top or bottom. Again, I’m placing them at the bottom.

Sew the units to the strip, leaving a small space between them.

Press to the newly added fabric…

…then cut the segments apart and trim to size. Even if you cut the strips at the exact width you need, you should trim the excess fabric from the edge of the new segment. I prefer to leave enough space between the segments so I can get a scissors in there and snip them apart, then press individually and trim with a rotary cutter.

Continue placing the units on the next strip, newest unit down, then sewing.

In the photo below you can see why I like to be able to get my scissors between the blocks. The first two units just added the first dark strip, while third unit has the first dark strip sewn to it and is getting ready to add the second dark strip. That third unit WAS at the front of the line, but when I sewed the third unit I reached up and snipped off the first one, pressed it, trimmed it, and placed it on the dark strip without removing the strip. Once that one is sewn, I can cut off the other two, trim and press, then add them to the same strip.

Keep sewing, pressing and trimming until you have as many rounds as you want.

Log Cabin Block Variations
Okay, now it’s time to talk about the different types of log cabin blocks.
Traditional
The traditional log cabin block starts with a center square, then add logs of equal size to each consecutive side, rotating the block either clockwise or counterclockwise 1/4 turn for each addition. Two consecutive sides are light and two consecutive sides are dark. You can add as many or as few rounds as you like. Wider logs are easier, but you get a greater effect with the settings when you use narrower logs and more blocks.
This is a basic four block log cabin, with large strips or logs. It follows the most traditional block design, with light strips on two consecutive sides and dark strips on the other two sizes.

Also a traditional log cabin block, the skinnier strips and larger finished quilt below allow a more complex layout.

The traditional log cabin block is divided diagonally into dark and light, and there are many settings that take advantage of this.
Here is the block:

Because the traditional log cabin block is divided diagonally into light and dark sides, you can create literally hundreds of different settings just by twisting the blocks. Some settings are very well known:


When you start experimenting with the block layout, however, you realize that the possibilities are almost endless. Here are some examples:


Even changing something as small as a single fabric can completely alter the appearance of the top. Here’s the same quilt as the one above, but with one fabric changed to a very light value.

Hard to believe there’s just one change, isn’t it?
Here’s a gorgeous “first” log cabin from Kim Burley (quiltinkimmie on Flickr):

As you can see, the traditional log cabin block can be interpreted so many ways that you could literally make log cabin quilts for the rest of your life and never duplicate one.
Other Shapes
You can use the log cabin technique with any central shape. Here the logs are built around a triangle, and six triangles are joined to form a hexagon. I received this gorgeous mini quilt in a Flickr swap from sewwunderful.

This variation uses a different central shape, a diamond, and was made with a Honey Bun – precut 1 1/2″ strips.

Any shape with straight sides can be the base of a log cabin block. Consider a rectangle, pentagon, hexagon or even octagon log cabin.
Chevron Blocks
Log cabin blocks that are built on two sides of the center rather than all four sides are also called Chevron blocks.
Are you familiar with the immensely popular Bento Box quilt? That’s just a Chevron log cabin block turned so four blocks form a square. If you make both rectangles in each round (a “round” consisting of just two sides) the same fabric, you can create interesting patterns when you rotate the blocks.
You can also create effects with graduated values – start with a dark center and move to a light outer round, or do the reverse.
You can color the Chevron so it is split diagonally into light and dark halves like the traditional log cabin, and use the same setting variations, such as this Sunshine and Shadows.
This quilt, a variation of a pattern called Mosaic Magic from the December 2006 issue of McCall’s Quilting, is a Chevron with half square triangles at the ends of the logs. The pattern emerges when blocks are rotated.

Courthouse Steps
The Courthouse Steps block is created just like a traditional log cabin except you add the logs to opposite sides of the block instead around the block.

You can approach this block several ways. The block above uses the same value on opposite sides of the block. When you set the blocks together in a quilt you can either set them in the same direction…

…or rotate alternate blocks one quarter turn.

Along the same lines, you can use one color as a “background” on two sides, then use two different colors on the other sides.

Another option is to use one color on each side of the block.

Rotate the blocks so the colors line up with the block next to it and you’ll create a secondary pattern.

If you enjoy planning and organizing, you can also place colors in each block so they match the block next to it. You have to be careful with this layout because each block is different. It’s a gorgeous effect, though.

Pineapple
A pineapple log cabin is created just like a regular log cabin, except after sewing logs on all four sides, you go back and sew them on the corners, too!

Some of the most striking pineapple quilts are made with a strong value different between the logs that go on all four sides and the logs that go on the corners, as in the block above and quilt illustration below.

Another option is to use a single fabric or value for the side logs and two contrasting colors for the corner logs, so the same color is on opposite corners. In this block, I added more corner strips to continue the effect (rather than ending in large triangles).


This adorable pineapple was created by Kim Burley (aka quiltinkimmie on Flickr). She chose to make the side logs from two different colors, then added the corners in a third color.

I was fortunate to take a class in foundation piecing from the queen of pineapples, Jane Hall. Check out her gallery of quilts to see what you can do with a pineapple and a lot of imagination. I especially like her Chroma series.
Foundation Piecing
Log cabin blocks are well suited to foundation piecing. In fact, when we get to the foundation piecing skill builder, my block will be a log cabin variation. Traditionally, log cabins of the 19th and early 20th century were foundation pieced on fabric because they used narrow scraps of fabric, much like string quilts. In fact, a string quilt is essentially a log cabin that has a straight line for a center – you build outward on two opposite sides.
Another swap mini quilt, this is one I made for a foundation piecing swap. Although it is foundation pieced (sometimes called paper pieced), the flowers are essentially log cabins that use irregular shapes for the center and logs.

This quilt was also foundation pieced, but if you look closely you can see that it is a log cabin that uses flying geese (stretched) to form the logs.

Adapting the Technique
You can take the basic concept of a log cabin – a center with rectangles sewn around it in rows – and adapt it by changing the rectangles.
A common technique involves adding squares two or four corners. These squares are called cornerstones. With a noticeable value difference between the cornerstones and the other fabrics, interesting patterns appear as the blocks are put together or rotated.

The light/dark value still creates patterns, but the cornerstones emphasize and even add to the designs.

A double cornerstone can be colored like a traditional log cabin or like a courthouse steps variation.


Instead of squares, try using rectangles to create the cornerstones. The Mosaic Magic quilt above is a result of half square triangles used as cornerstones.
Another way to change the appearance of a log cabin is to change the width of the logs. For example, the light logs might be wider than the dark logs, or vice versa.


The quilt below was my first original quilt design. It starts with a traditional log cabin block, but the light strips are slightly wider than the dark strips, resulting in a curved effect. The triangles at the ends of the strips is another variation. This shows yet another way the setting, or the way the blocks are laid out, can take advantage of the light and dark values in the blocks.

Try playing with value and color. This gorgeous green and white spiral quilt from Cheryl’s Teahouse on Flickr shows how using the same fabric in consecutive rows to create texture without color change. It also takes advantage of the circular piecing method to create a spiral.

Improvisational Log Cabin
Another example of the versatility of the log cabin block is it’s prevalence in improvisational (also called free-pieced or wonky) quilts. In improvisational quilts you assemble blocks and quilts in a looser, more relaxed way. The center of the log cabin may be a non-symmetrical shape, the logs may be of different widths, angled pieces, or even pieced within a single log, and the blocks may be deliberately crooked. Here’s a fantastic example from Kim Burley:

There are some gorgeous free pieced log cabin variations out there. As with any block or quilt, the use of value, color, and fabrics can elevate a free pieced log cabin quilt from “meh” to “wow!” In Kim’s block above, she sticks with the traditional value placement but uses logs that are different shapes and widths. At the very end, however, she squared up the block to a predetermined size. You can get as crazy as you like with the blocks as long as they end up the same size so they can go together into a top.

This blocks above by Manuela (at Yara’s work on Flickr) uses the square in a square design with varying log widths. Look closely and you’ll see that some of the logs are different sizes or fabrics on each side of the block, and some are even pieced within the strip. The white brings it all together, but the darker fabrics scattered throughout keep your eye moving across the quilt. Here’s the finished quilt:

Here’s another version that uses bright, saturated colors, by Anna at Lasso The Moon. You can see photos of the finished quilt in her Flickr photostream, but I really like how this photo of the blocks shows the variety of colors. What I find interesting with these blocks is that she used two colors in each block, but built one color around a center of the other color.
Congratulations, you made it through this monster post! By the way, if you were to print it, pictures and all, it would take 37 pages. Definitely my new record. Did you manage to read it all in one sitting, or did you have to come back to it?! Do you have any questions about log cabins, or would you like to share a story about your log cabin quilt(s)?

Oh my! Thank you for all that work. I have to admit I didn’t read it all but I looked at every picture and am overwhelmed with the variations possible! Once again, thank you.
Brilliant post! I love the detail you went in to regarding all the possible variations- it really is staggering how much can be achieved with rougly the same technique. I’m feeling inspired to get back to the scrappy log cabin block I started a while back!
What a great blog! This puts the log cabin books I’ve read to shame. There are some truly wonderful quilts shown here, plus some really cool ideas for future ones. I am a sucker for cabins!! Oh, and thanks for adding my photos. Kimmie
What a fantastic post! I found it fascinating and read the whole thing. The first patchwork I ever did with my gran was a traditional log cabin block, which I then made into a pillow, with the red “fire” in the centre, and the two blue and red halves of the cabin with a gradient from light to dark. My next project is going to be based on log cabin blocks too, but with the square in square format.
Thank you so much, I love your post . My next project is a half log cabin, and you gave me a lot of ideas. ( ooooh, very bad english, sorry but I’m French!)
Amazing post! The progression of those designs is fascinating. Thank you for what must have been hours and hours of work!
I can’t believe the effort you put into this post! Absolutely amazing! I am keen to do a curved log cabin quilt and your post has inspired me.
What a fantastic post. This will deffinetly be a “must read” for my sister-in-law when I start teaching her to quilt. Thank you for all your work
Thank you for your blog. I am teaching elderly ladies how to make quilts. These ideas will help alot. You are so kind to share.
Absolutely the best and most informative blog I’ve ever read. Just signed up to follow you.
çà donne envie de s’y remettre !!!! bravo
it is so helpful thanks a lot
awesome post…. forever relevant!
Oh the endless possibilities of Log Cabin blocks!!! Thanks for sharing. I found you on Pinterest.
Thank you so much for sharing, you are definitely a great Creative Quilting Artist. I wonder if you would answer a question for me? I am relative newbie, and have just finished my first Log Cabin Blocks about to square them up and the sew them together. Before I do so, would you have any hints on how to square up a log cabin block?
Regards
Wendy
I feel so proud of myself, I just made my very first log cabin block, and it looks pretty good for someone who has only been sewing for 4 months 🙂 I found your website after trying to figure out pinwheels just off the top of my head. Thank you so much for this wonderful resource, I feel like I can move past rag quilts and on to real pieces of art
My first quilt was a log cabin,barn raising,and I am still enchanted with all the various lay outs .thankyou for sharing this with me
I keep coming back to the log cabin and your post is by far the best. Once again thanks for the clear descriptions and multiple pictures for future reference.
Wow! In awe of your pics & wonderful info. Thanks so much. Now I must say I do not quilt; however 2 yrs ago, I actually crocheted a huge ‘quilt’ of granny stitches. No pattern to go by, but with a granny square in center, I contd around it changing colors. Your pics give me more ideas! Thanks again.
Mary Lewis–what a great idea, crocheting log cabins instead of granny squares. Do you have any pictures?
Wow I like log cabin have done one for my grandson with a print of air balloons in centre square it looked good
I read it all, saved it and am delighted you took all the time to educate us!!!!!!!!!!!!! THANK YOU
God bless you for your excellent post! I love log cabin quilts (mine tend to be more on the wonky side) but never understood the “science” behind them. I just sewed strips together😜! I did read the whole thing, snapping screenshots every so often before I saw the beautiful PDF version. 😜😜. I’m going to be teaching a friend how to quilt soon, and thought I’d start with log cabins, (because they’re straight) so this is a perfect textbook for her! and I’m going to sound more expert than I really am, thanks to you! Hope you have more like this!
Thanks for the kind words, Mary! Actually, I do have more posts like this. It’s part of a skillbuilder series a friend and I were working on. Here’s the main page: https://piecemealquilts.com/skill-builder-series/ I hope you find it useful when teaching your friend to quilt. Sandi
Great quilt show! Can you show us the log cabin layout of an angel?
This shows why at 73 I am still fascinated by the creative pleasure of quilting. Thanks!
Brilliant blog and so generous of you to share all that information. Thank you.