My mom’s cousin is Superwoman. Well, at least she’s super-fit. She has organized a group of women for a walk around Door County, Wisconsin, and asked if I could work with her to create a water bottle bag that would be used in place of a regular purse. I futzed and futzed and futzed (name that song/movie) and came up with a version that was super easy to make. It had a hidden pocket for money and other very flat, small, or flexible stuff and was lightly insulated. It wasn’t quite what they needed, so I added another pocket that was a bit pouchier for small snacks, keys, a phone, etc. It’s still a pretty small pocket, but I needed it to fit on the water bottle, and not add too much bulk to the overall bag. I also changed the strap so it wasn’t attached directly to the bag, but to D rings that were sewn to the bag with webbing. This allows the strap to hang easier depending on who’s wearing it and how (shoulder, cross body, etc.).
After finishing that version and using it for a day, I decided to make the pouch pocket a little shorter. The part that wrapped around the bottom was unusable anyway, and without that part you can stand the bottle upright with a little squishing of the corners. I took photos during the initial construction and again when I added the pouch pocket. (During the pouch pocket photos you can see thread crumbs along the edges where I ripped it apart!) Some photos show a strap, but that has been replaced by the webbing and D rings and I forgot to take photos. If you choose to do a “hardwired” strap, be sure to insert it at an angle rather than straight out the sides like I did.
Since I needed to write up the instructions for Connie anyway, I thought I’d go ahead and post it here. There is an AWESOME button at the bottom of the post, next to the Facebook and Pinterest buttons, that says “Print & PDF.” If you click on this you can print the instructions or turn it into a PDF that you can save on your computer. You can also click on sections and they’ll be removed from the document, so you can delete the photos if you want, or the header, or these introductory paragraphs.
This is based on my notes and photos and has NOT been tested by making a bag straight through using these instructions. If you find an error or have a question, please let me know.
Okay, here we go…
The Connie Bag
by Sandi Walton/Piecemeal Quilts

Notes
An outdoor decorating fabric is ideal because it is water resistant and a bit sturdier than other fabrics. Regular home dec fabric would also work. The bag above was made with outdoor dec and has been through the washing machine and dryer once already.
There are several places where I tell you to backstitch. When I do this over a longer area, I like to sew an inch or two at a time, then backstitch, then go forward another two inches, then back, etc.
This bag is actually a perfect fit to hold a Kindle when it isn’t holding a water bottle! You could easily alter it to be a Kindle case by not folding the velcro pocket up as far, omitting the drawstring casings, and turning the excess fabric into a flap.
Supplies:
Outer fabric: 1/4 yard of 60″ fabric or 1/2 yard of 42″-56″ wide fabric
Contrasting inner fabric: 1/4 yard
Insul-Brite® batting from The Warm Company (for making hot pads, etc. – it will insulate a little better than regular batting, but you can use regular if you prefer)
Fusible web (Pellon Wonder-Under®, Warm Company Steam-A-Seam®, etc.)
1″ Webbing: 2 yards
2 D or Rectangle Rings (for 1″ straps)
2 Swivel Hooks (for 1″ straps)
Cord, heavy string or ribbon: 1 yard
Optional:
1 Strap Adjuster (for 1″ straps)
2 Cord End Stops

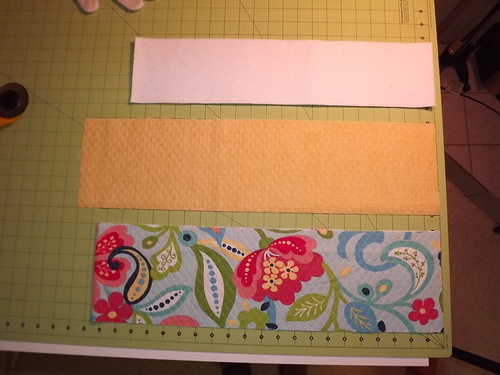
Cutting
From the outer fabric, cut three pieces:
43″ x 6″ (body)
8″ x 6″ (pocket)
8″ x 4″ (flap)
From the inner fabric, cut two pieces:
23″ x 6″ (body)
8″ x 6″ (pocket)
Cut a piece of batting 20″ x 4 1/2″
Cut a piece of fusible web 20″ x 4 1/2″ (not shown)
Cut a piece of velcro 5″ long
Body Assembly
Fold the large outer fabric in half with the wrong sides together. Center the hook side of the velcro on the fabric 1/4″ from the folded edge.

Top stitch 1/8″ from the fold through both layers of fabric.

Flip the bottom layer back and sew the velcro to the top layer only.

Fold both layers up so the folded/stitched edge is approximately 2 1/2″ from the cut edges.

Mark the velcro placement.

Sew the loop side of velcro to the top layer of fabric.

Fold the fabric back up and attach the two pieces of velcro together.

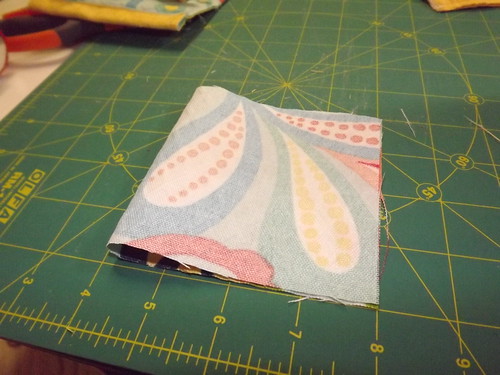
If needed, trim the cut edge so the outer fabric with the pocket you’ve just created is the same length as the inner fabric (both shown folded in half).


Iron fusible web to the batting…

…peel off paper backing…

…center batting on wrong side of inside fabric with the fusible side down…

…and press. If you are using fabric that has a texture embossed in it, this will flatten the embossing.

NOT SHOWN: Cut 2 pieces of 1″ wide webbing approximately 1 1/2″ long. Insert through D rings or rectangle rings an fold webbing in half. Pin to hold in place. The webbing and rings will be used instead of the straps that are shown in the following photos.
Layer the fabrics and rings/webbing in the following order:
- Outer fabric right side up
- Rings/webbing just below the velcro pocket, with the rings on the fabric and the cut edge of webbing extending slightly outside the edges of the fabric
- Inside fabric with the batting side up
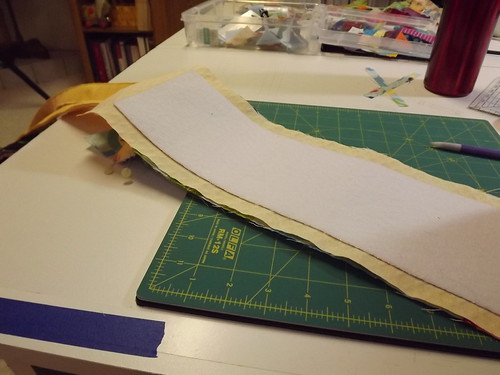
Sew 1/4″ from the edge on two long sides and one short side, leaving one short side open.

Reinforce the webbing by backstitching over that area, then stitching forward again. Turn right side out, poking out the corners so they are fairly square. Press the edges all the way around, manipulating the fabric as needed to keep a crisp edge. Try to keep the seam as close to the pressed edge as possible. If you have embossed fabric, press only the edges to avoid losing the embossed pattern.
Turn in the fabric at the open end 1/4″ and press.

Topstitch 1/8″ from the edge to close the opening.

To make the casings for the drawstrings, fold that edge back so it just touches the top of the velcro pocket and topstitch just above the stitching line. Repeat at the other end.


Pouch Pocket
NOT SHOWN: Place the 6″x8″ outside and inside fabric pieces right sides together. Sew around the edge with a 1/4″ seam allowance, leaving a gap to turn it. Turn, then press the edges as before to create a crisp edge. Turn the edges in along the open area and press. Top stitch 1/8″ from edge OPPOSITE the opening. You can topstitch the opening if you like, but it doesn’t really matter – it will be hidden inside the pocket.
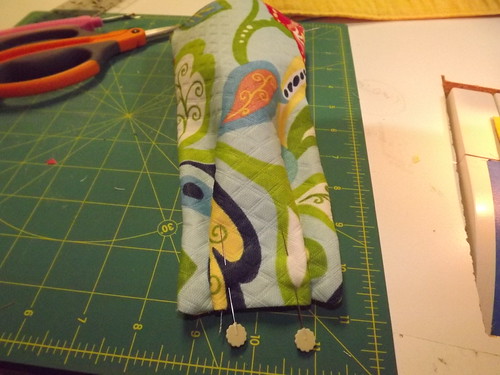
Along the edge with the opening, place pins every 1″ – these should be centered!

Fold the fabric to make a pleat, lining up two pins and making sure that the pleat is on the correct side (so the pouch is on the outer fabric side). You may prefer to have the “inside” fabric on the outside of the pocket, for contrast.

Pin the pleat in place, removing the excess pins.
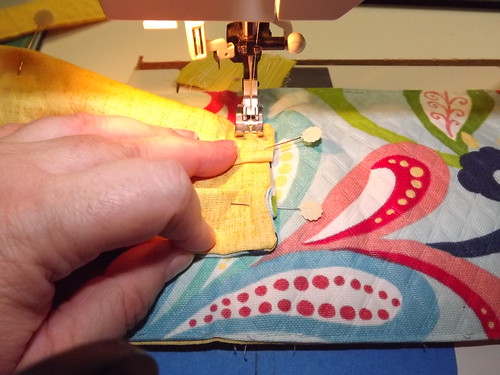
Center the pouch pocket on the plain side of the body (not the side with the velcro pocket), about 1/2″ below the casing.

Mark the location of the bottom of the pouch, then flip it over and place the pouch, inside up, 1/2″ above where the bottom edge was.

Sew 1/2″ from the edge, backstitching along the entire length to reinforce.
Pocket Flap
Fold the 8″x4″ outside fabric right sides together.
Stitch around the sides using a 1/4″ seam, leaving a gap to turn it right side out. Turn and press the edges and the gap.

Top stitch on 3 sides.

Assemble
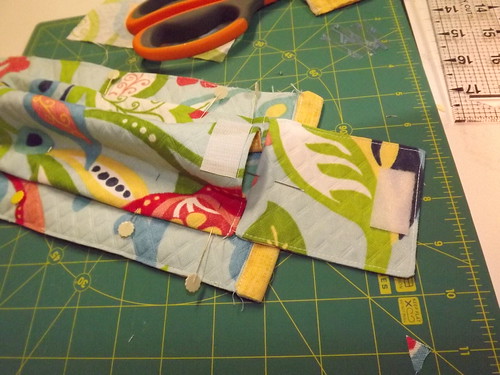
Flip the pocket into place and tuck the sides in so they are parallel to the body edges and pin. Place the flap so it is just touching the edge of the pocket and pin.

Place the velcro on the pocket and on the flap. I used sticky back velcro so I could reposition it, but you can pin it instead. The flap velcro will not be sewn yet, even though it’s in the photos.
Unpin the top edge of the pocket, turn back the body, and stitch the velcro in place.

Re-pin the pouch. Top stitch the sides of the pouch in place, backstitching all the way.

Stitch the bottom edge of the flap in place.

Fold the body in half, insides together. The pouch pocket will not be quite as long as the photo, since I shortened the pocket in the instructions.

Topstitch both sides, backstitching all along the way to reinforce.

Stop just before the casing on both sides.

Put a bottle in the pouch and decide where you want the velcro placed on the flap. Mind ended up being back a little from the edge. I like that there’s a little space to grasp the flap, and the pocket is more contained with the flap being a little lower. Stitch the velcro in place.
String the cord or ribbon through the casing. I like to use two pieces of cord and run one through one half and back on the other half, then run the other piece of cord through both halves starting from the other side. Tie the cord ends together on each side, or use a cord stop on each side to keep them from sliding back through. By stringing it through both ways you can just tug on both ends to tighten it.
Strap
The strap is super easy to make, with or without a strap adjuster. If you’re making it without the adjuster, simply sew the swivel hooks on each end of a strap that you’ve cut to the length that fits you. Remember to add about 3″ to the length you want it to be so you have plenty of room to sew. Sew a square, then an X, then around the square again.
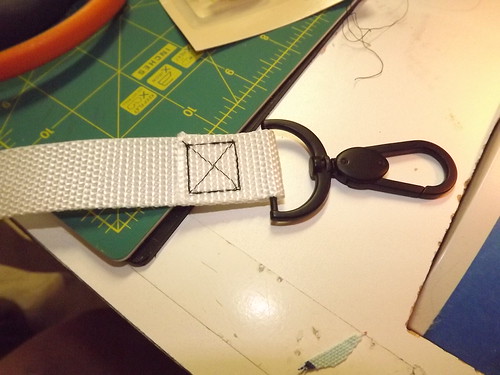
If you want to use a strap adjuster, cut a piece of webbing about 1 yard long and sew the swivel hook to one end, as shown above. On the other end, sew the strap adjuster. You’ll sew to the cross bar at the straight end of the adjuster (not the very outside piece).

Again, sew the square and X then reinforce with another square.

The photo shows a shorter length of webbing – ignore that! I’m not actually using this as a strap, just an example. It’s better to put the adjuster on the longer side of the strap because when you pull it to shorten the strap, you’ll be pulling down instead of up. This way the excess strap won’t flop over.
Sew the second swivel hook on the end of another piece of webbing. It should be fairly long, but don’t worry about the exact length just yet. Slip the plain end of webbing behind the strap adjuster, through the space next to the other strap, over the grooved bar and back through the space.

Attach both swivel hooks to your bag and place it diagonally across your body, then adjust the strap to the length that is comfortable for you. Cut off the excess strap 8″-10″ above the strap adjuster. You can finish the end by folding it back and stitching securely, or you can just leave it cut. Run a flame across the cut edges of the webbing to melt them and prevent them from fraying.
And that’s it! Let me know if you have any questions.
The fine print: As with any of my free patterns and tutorials, please do not mass produce and sell things made from my patterns (as if!). Print a free pattern in its entirety as many times as you like and share it with your friends or guild. Use it to make objects for gifts, fundraisers, competition, donation, or to make and sell singly. I’d love it if you send me an email if you’re using it for something special, but you don’t have to. Do not reproduce my instructions in whole or in part and sell them.

Wow! Thank you for sharing how to make this very handy-looking sports bag. These tutorials take a lot of work to put together. I bet my daughter would love to have one or two of these bags.
Very nice! And I like the pdf button. Very handy. 🙂
Very clever! I knitted mine but it has no pockets and the strap is too long and stretches as its being worn. Yours looks much more practical.